2/27/2017

Miracles still happen

Three years ago, my friend and I had a startitis week at the beginning of February: We had to start a new project every day during that week. I started a cardigan. I knitted about 8 cm of it. And then, for the last three years, I've been listening to my friends joking about the cardigan. They didn't believe me when I told them I dug it up from the UFO pile and finished it. To be totally honest, I almost didn't believe it myself.


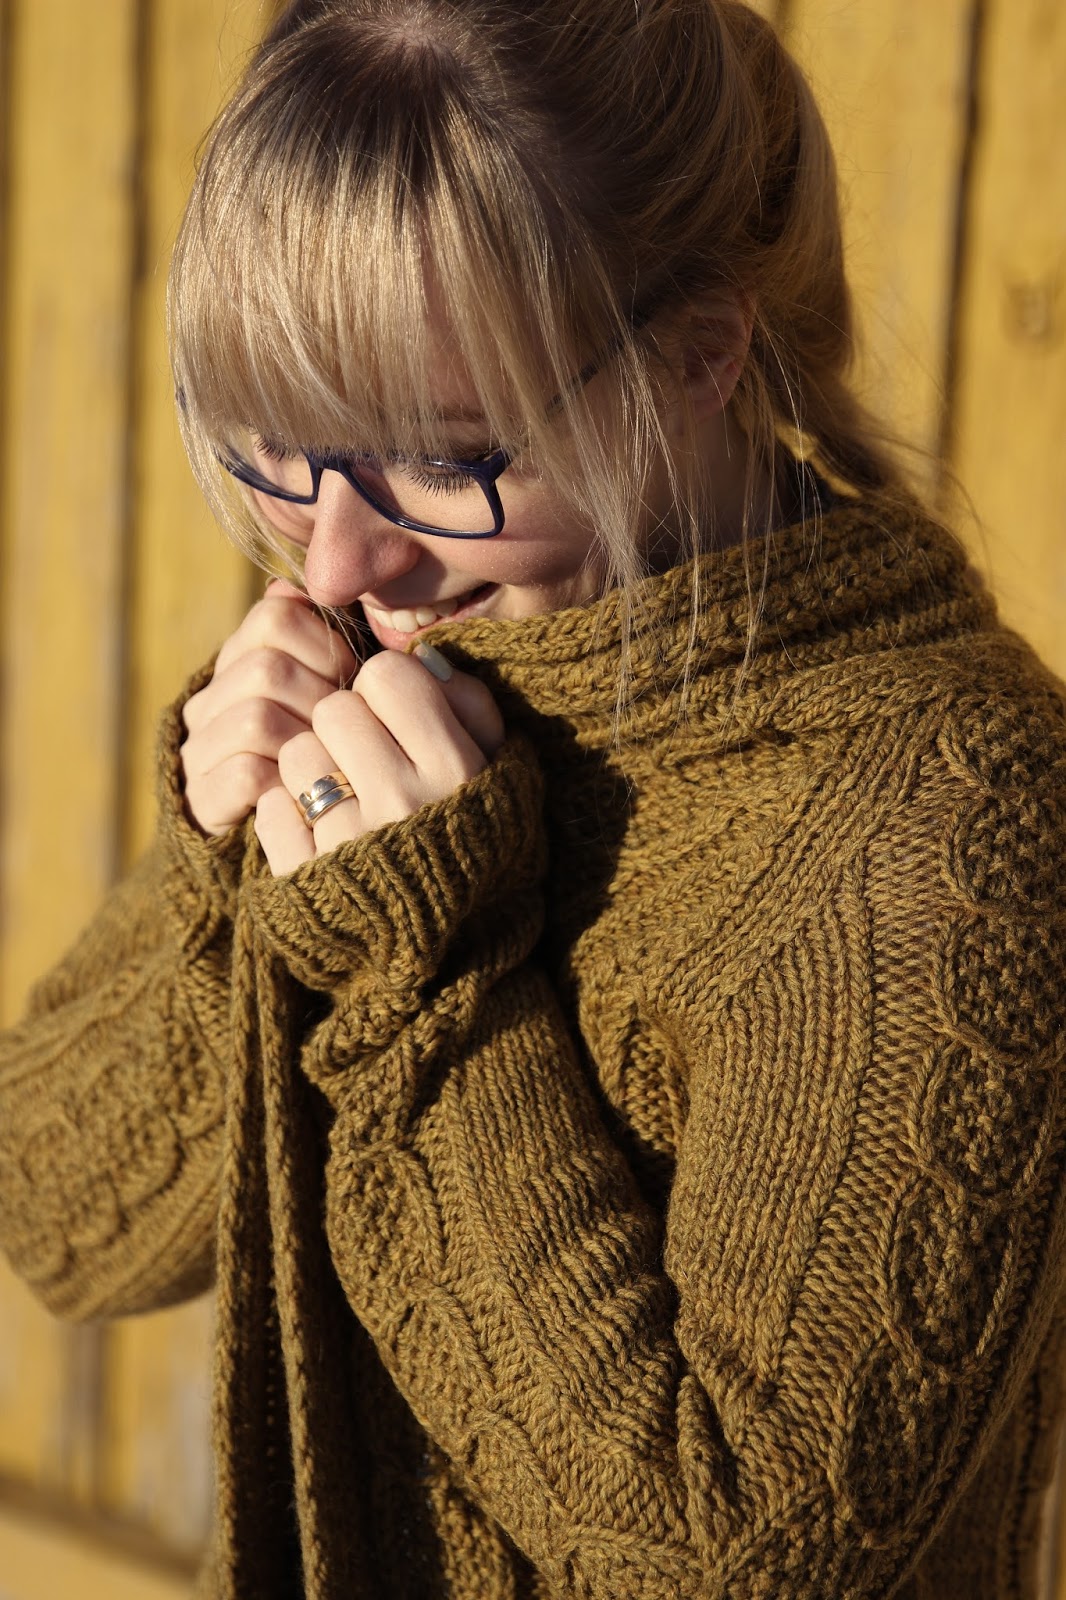
What: Aidez / Cirilia Rose
How: Circular needles 6.0 and 7.0 mm
From: Cascade Yarns Eco+, 450 g
Ravelryssa

Aidez is a popular free pattern for thick yarn. My LYS promised me, three huge skeins of Cascade Eco+ would be enough. I was a bit hesitant to believe them but I bought the yarn and cast on.


It is so silly, but my enthusiasm for knitting this project stopped right away when I had to think. Years ago, when I started the cardigan, I modified the st counts to fit me better and then completely forgot about it. Every time I was about this pick this back up, I started to second guess my modifications and left the project to wait for better days.


In no-new-projects-January, I finally decided to give up on my Aidez and was about to frog it. I took the needles off and tried it on for one last time before frogging. And what do you know, it fit me perfectly! So I guess, I had really thought about the st counts and come up with the right number after all. I quickly picked the sts right back on the needle and started working on the cardigan.


There are at least four different cable patterns that all move at a different pace. When I started this project three years ago, I made myself one enormous chart that had all the necessary charts together. Without my giant chart, getting back to this project might have seemed like too big of a task. But once I got back to it, it turned out, the charts were easily memorized and after a few rounds I didn't need my giant chart any more. Although, upon finishing the cardigan, I noticed I had worked one of the charts wrong the entire time. But who cares, it looks nice anyways


The pattern is written to knit bottom up in pieces with loads of seaming at the end. I didn't care for such folly and modified the project to be knit bottom up in one piece. I knitted the fronts and back in one piece all the way up to the armholes and left the sts waiting. Then, I magic-looped the sleeves two at a time in the round until I reached the armholes. Next, I joined the body and the sleeves and worked the raglan decreases. Since I wanted to avoid any seams, I worked the shawl collar seamlessly as well. I worked both sides to the center, joining to the back as I went and finally used kitchener stitch to join the sides. I also tried to give the collar a bit of shape with short rows just before the center back.


Once again, blocking worked wonders. Fresh off the needles the cardigan felt a little too tight for me and didn't look as nice as I had hoped. I almost wanted to throw it in the corner and leave it there. I'm glad I didn't, as the garment stretched plenty once I soaked it and actually turned out just the right size after blocking. The yarn behaved almost like alpaca even though the label says it is highland Peruvian wool.


And talking about the yarn, you can't imagine how soft it feels! It's unbelievably light and fluffy. It feels like I'm wearing a warm cloud. And in the end, I didn't use even two whole skeins! I could almost make another one with the left overs.


So the cardigan that was on time out for three years, turned out to be a really easy knit and an excellent over-sized, relaxed cardigan. I will sure be using this a lot.

2/23/2017

Iron gate beanie

The test knitters for Wrought iron sweater had the excellent idea of a beanie with the same lace pattern. I couldn't resist, so I wrote a beanie pattern to accompany the sweater.


What: Iron gate / Oma ohje
How: Circular needle 3.0 mm
From: WalkCollection Cozy Merino + Hedgehog Fibres Skinny Singles, 75 + 10 g
Ravelryssa

I had left overs of the contrast color from the sweater, plenty enough to design a hat. Main color I had to get from my LYS. I found this lovely, kind of a lead shaded green merino single.


The idea was to use the same lace as in the sweater. I felt that the hat would hold wind at all, so in order to stay warm in my new beanie, I made it double layered. No more cold ears! I also like how well the lace stands out against the main color.


The knitting starts at the crown of the lining. A few increases and then lots of plain stockinette stitch. The brim is twisted ribbing and the hats are fastened at the top of the ribbing so that they stay in place.

The contrast color lace in this one is knitted as intarsia in the round. But don't worry, the pattern includes a photo tutorial. If you don't dare to commit yourself to an entire sweater, this beanie is a quick project for trying this interesting technique.


While designin the beanie, I was a bit nervous on how nicely I could make the decreases on the lace, but they turned out really pretty and made this knitwear designer happyhappy.

You'll need an almost entire skein of the main color but only about 10 grams of contrast color. I still have some left from the sweater and the hat. Any ideas on where to use the rest?


The hat has been on my head every day since I finished it. The lining makes it really warm and the merino single yarn is super soft on the head. The lace goes well on a sweater and on a hat. The play with knit and purl stitches gives a bit of a 3D effect.

The pattern has been test knitted and is available on Ravelry. You can get the pattern at half price if you purchase or have purchased the Wrought iron sweater as well. Add them both to your Ravelry cart and the discount should show up automatically. Or, if you have already bought the sweater, just add the beanie to your cart and you should see the discount. The offer expires at the end of Saturday February 25th.

2/19/2017

Knee-highs of my dreams

Last summer I developed a craving for knee-high socks with stranded knitting. I had to get me a pair. Or at least start a pair and utterly forget once the gift knitting starts. But in our no-new-wips-January, I finally returned to this project and finished it. And oh boy, did they turn out cute!


What: Knee-high stranded socks / own pattern and lending charts from others
How: Circular needle 2.25 mm
From: Triskelion Elen Sock, 140 g

Once upon a time, there were two beautiful skeins of soft BFL sock yarn that wanted to be stranded socks when they grow up. Since I wanted to combine a zillion charts, I didn't by any pattern but came up with my own and borrowed a few charts from other socks.


First, I took the toes from this pattern. I knit the feet with just the grey to keep the socks calmer looking. For the legs, I borrowed one chart from these socks. The topmost snowflake chart was also from somewhere on the internet but rest I made up.


The heels gave me a bit of a headache - this yarn doesn't have any nylon in it. I decided to work the heels with short rows. This way, If they wear through, I can just pick up sts at the edges and make new afterthought heels. I also knitted the heels in two colors to make them more durable. We'll see how they'll survive.


I added sts between the charts to make room for my calves. I did a pretty good job even though I usually tend to knit stranded socks too tightly. Why is it so hard even when I constantly try to keep my tension loose? Luckily, these socks fit me quite well. I finished off with a chunk of (k2tbl, p2) ribbing.


Usually, I finish my socks with blockers but they aren't long enough for these knee-highs. It was quite the blocking operation: I soaked the socks and slipped the sock blockers inside them. Then, I added two blocking wires to stretch the legs. It was worth the trouble since stranded knitting really needs proper blocking to tidy up.


Now I have a pair of socks that won't be hidden in my shoes - that is, if I ever muster up the nerve to use these in shoes.

2/15/2017

xoxo socks

Oh, how embarassing! My knitterly friends and I had a no-new-wips-January where it was forbidden to start any new projects unless you had finished all the old ones. The good intention there was of course to free up some needles and lower the ever growing number of wips we have. And to keep us motivated, there was the threat of a monstrous punishment for breaking the rules.


What: xoxo / Own pattern
How: Circular needle 3.5 mm
From: Novita 7veljestä, 150 g
Ravelryssa

Yes... I was obeying the rules. I didn't start any new projects but finished many old UFOs. But then came along this secret thing that I had to swatch for. I swear I wasn't going to knit it until February, just to swatch. But my friends were ruthless and said a swatch was a violation against the rules! Ok, if I'm being totally honest, I may have been the one that came up with this rule last January...

As a punishment, I was ordered to go to the super market and buy the most ghastly yarn we (friends of handpainted luxury yarns) know of. The task was to buy a skein of market yarn and knit something for myself. And I had to use the whole skein. Cruel, I tell you.


I admit those high-quality hand dyed yarns tend to assassinate your bank account but boy, are they worth it! I've been complaining about the quality of market yarn for years even though I've had no experience in it for many, many years. Well, now I do. I didn't like it one bit. The whole skein was this prickly, coarse dust that scraped my hands. My eyes were watery and itchy, my fingers ached and I couldn't stop sneezing the entire time I was knitting.


But I didn't have a choice. I made the swatch so I had to pay the price. I decided to knit socks because knitting toe up, I could be sure to use the entire skein. Also, socks can be worn over other socks so the prickly yarn won't get to touch my skin. I wanted to find a silver lining in this itchy dust cloud, so I designed a new sock pattern. I'd say this would be a lot nicer knit in some lovely hand dyed DK-weight yarn.


xoxo


Simple cabled socks knit toe up. The pattern is written for magic loop technique but you can use dpns if you prefer them.

Yarn: Novita 7veljestä / Any heavy sport or DK-weight yarn, 150-200 g
Needles: 3.5 mm

m1l = make 1 left. Pick up the yarn between sts by inserting the left needle under it from front to back and knit it through the back loop.

m1lp = make 1 left purl. Pick up the yarn between sts by inserting the left needle under it from front to back and purl it through the back loop.

m1r = make 1 right. Pick up the yarn between sts by inserting the left needle under it from back to front and knit it through the front loop.

m1rp = make 1 right purl. Pick up the yarn between sts by inserting the left needle under it from back to front and purl it through the front loop.

ssk = slip, slip, knit. Slip 1 as if to knit, slip 1 as if to knit, move the sts back onto the left needle and k2tog through the back loop.

w&t = wrap & turn. With the yarn in back, slip the next st, bring the yarn to the front, move the st back onto the left needle and turn work. When you came to this wrapped st on the next round/row, knit the st and the wrap together.

Instructions


Both socks:

Using Judy's magic cast on, CO 16 sts (8 sts on each needle).

Inc rnd: (k1, m1l, k until 1 st left on the needle, m1r, k1) x 2.

Repeat the increases on every round two more times and then on every other round 5 more times. (26 sts on each needle).

Start knitting the xoxo chart.

Left sock:

Next rnd: On needle 1, knit the chart, on needle two, p1, k to end.

Continue knitting the chart on needle 1 and purling the first st of needle 2 until you have worked rounds 1-16 from the chart. 

Right sock:

Next rnd: On needle 1, knit the chart, on needle 2, k to last st, p1.

Continue knitting the chart on needle 1 and purling the last st of needle 2 until you have worked rounds 1-16 from the chart.

Both socks:

Next rnd: On needle 1, knit the chart, on needle 2, p1, k to last st, p1.

Continue knitting the chart on needle 1 and purling the first and last st of needle 2. Once the sock measures 6 cm less than the desired length, start gusset increases.

Inc rnd: On needle 1, knit the cart, on needle 2, p1, m1lp, knit to last st, m1rp, p1.

Repeat the increases on every second round 6 more times. Purl the increased sts. (26 sts on needle 1, 40 sts on needle 2). Next, work the heel turn and heel flap with short rows:

Row 1 (RS): On needle 1, knit the chart, on needle 2, p7, k22, w&t.
Row 2 (WS): p20, w&t.
Row 3: k18, w&t.
Row 4: p16, w&t.
Row 5: k14, w&t.
Row 6: p12, w&t.

Next, you will be slipping the first st of each row. On WS, slip it as if to purl and on RS, slip it as if to knit.

Row 1 (RS): p17, ssk.
Row 2 (WS): slip 1, p22, p2tog.
Row 3 (RS): slip 1, p22, ssk.

Repeat rows 2-3 four more times and the row 2 once more. There are 26 sts on each needle. Continue knitting in the round so that you knit the chart on needle 1 and purl the first and last st of needle 2.

Once the sock measures 18 cm from the top of the heel flap, work 10 cm (k2, p2) ribbing. Bind off loosely using Jeny's surprisingly stretchy bind off.


Left chart
Round 1: K17, p, k8. (26 sts)
Round 2: Repeat round 1.
Round 3: K17, p, 2/2 RC, 2/2 LC.
Round 4: Repeat round 1.
Rounds 5 - 8: Repeat rounds 1 - 4.
Round 9: (K8, p) x 2, k8.
Round 10: Repeat round 9.
Round 11: K8, p, 2/2 RC, 2/2 LC, p, 2/2 LC, 2/2 RC.
Round 12-13: Repeat round 9.
Rounds 14 - 17: Repeat rounds 10 - 13.
Round 18: Repeat round 9.
Round 19: (2/2 RC, 2/2 LC, p, 2/2 LC, 2/2 RC, p, 2/2 RC, 2/2 LC).
Rounds 20 - 22: ((K8, p) x 2, k8).
Round 23: Repeat round 19.
Round 24--26: Repeat round 20.
Round 27: (2/2 LC, 2/2 RC, p, 2/2 RC, 2/2 LC, p, 2/2 LC, 2/2 RC).
Rounds 28 - 31: Repeat rounds 24 - 27.
Rounds 32 - 34: ((K8, p) x 2, k8).


Right chart
Round 1: K8, p, k17. (26 sts)
Round 2: Repeat round 1.
Round 3: 2/2 RC, 2/2 LC, p, k17.
Round 4: Repeat round 1.
Rounds 5 - 8: Repeat rounds 1 - 4.
Round 9: (K8, p) x 2, k8.
Round 10: Repeat round 9.
Round 11: 2/2 LC, 2/2 RC, p, 2/2 RC, 2/2 LC, p, k8.
Round 12-13: Repeat round 9.
Rounds 14 - 17: Repeat rounds 10 - 13.
Round 18: Repeat round 9.
Round 19: (2/2 RC, 2/2 LC, p, 2/2 LC, 2/2 RC, p, 2/2 RC, 2/2 LC).
Rounds 20 - 22: ((K8, p) x 2, k8).
Round 23: Repeat round 19.
Round 24-26: Repeat round 20.
Round 27: (2/2 LC, 2/2 RC, p, 2/2 RC, 2/2 LC, p, 2/2 LC, 2/2 RC).
Rounds 28 - 31: Repeat rounds 24 - 27.
Rounds 32 - 34: ((K8, p) x 2, k8).

2/10/2017

Shawl + cardigan = blanket

You know the saying swirling around the internet?

Knitting is like sex. If I like you and
you appreciate it, its free. 
Other than that, you can't pay me enough.

That is so true. I mostly knit for myself but sometimes I come across something that looks like a fun knit and it's screaming the name of someone I know. If that lucky someone appreciates my little knitted gifts with some appropriate whooping, they might just be in for more knitted gifts.


What: Morvach / Lucy Hague
How: Circular needle 4.0 mm
From: Drops Baby Merino, 227 g
Ravelryssa

I've long been admiring the intricate cables on Lucy Hagues Morvarch shawl - except that it's not a shawl I would use. Instead, I know someone who loves all thing celtic and any fantasy inspired stuff. When I heard, this person was expecting a baby, I came up with a plan.


Yes, Morvarch is indeed a shawl pattern designed for lace weight yarn. But there's miles and miles of boring stockinette stitch in the shawl and actually everything interesting happens right in the beginning in the center of the shawl. I figured, using heavier yarn, this shawl pattern could be turned into a baby blanket by knitting just the center square of the shawl. And I wasn't wrong.


Few years back I bought beige Drops Baby Merino from the clearence sale of my LYS. The color didn't speak to me so it was headed for the dye pot. My lovely dyeing guru friend insists that I dyed this yarn - though in my memories, I mainly stood by the pot and said green would be great.


The shawl - or in this case, the blanket - starts at the center. It begins with some garter stitch with magical cables on top of it. Once the first cables are done, the rest of the square is shaped with short rows. That way the direction of knitting can be altered and the corners are knitted with stockinette stitch with more magic cables. After this, I threw the rest of the pattern out.


By this time, the blanket wasn't big enough so I decided on a garter stitch edge. At this point I remembered seeing a blanket with garter stitch edging and cables in the corners that would be a perfect fit for this baby blanket as well. Annoyingly, you couldn't by just the blanket pattern but had to purchase an entire e-book to get it. I didn't feel like spending so much on the mere blanket corners. Luckily, I remembered that I actually own one pattern from the e-book that uses similar cables and figured, I could probably just modify that chart to work with my project.


Turning the shawl pattern to a blanket was easy. All I had to do, was stop at the right time. Instead, modifying a baby cardigan yoke chart to work with the corners of my garter stitch edge, wasn't all that painless. I kept saying to myself how good it is I'm knitting the entire edge all at once so I won't have to remember how I worked the corners. I made the corner cables approximately as in the yoke chart. On every other round I increased one stitch on each side of the cable to make the corners corner shaped.


Once I had finished the cables, I bound off the edge like this: *k2tog tbl, move the st back onto the left needle*, repeat *-*. This way the bind off edge was elastic enough for easy blocking.


I almost forgot the most important bit! The magic cables. From the shawl pattern, I learned an easy yet incredible trick to make cables that start from nothing and end nowhere. Or can you tell where the cables starter and ended? I thought so! Once I learned the trick, I used it in the corner cables as well. I also picked up a trick for making almost horizontal cables without them putting a strain on the garment. I would say the designer has been sharpening her technique for quite some time. Wow. Just wow.

But perhaps next something a bit more relaxed knitting? Yeah right...

2/02/2017

Wrought iron

This here is my most recent design, published at the end of January.


What: Wrought iron / Own pattern
How: Circular needles 3.0 and 3.25 mm
From: Hedgehog Fibres Skinny Singles, 325 g
Ravelryssa

I designed a new sweater pattern, Wrought iron. This boxy sweater is knit top down seamlessly. It features long slim sleeves and a contrast color lace panel in the front. The hem, sleeve brims and neck band are twisted rib.


The sweater is worked in fingering weight yarn. I used Hedgehog Fibres Skinny Singles that gave me a pretty, flowy fabric. The colors I used are Charcoal (MC) and Stone (CC). Dependin on the size, you'll need three to four skeins of MC and about 30 g CC. So you can probably use some scrap yarn from your stash for CC. The pattern has sizes XXS-XS-X (M1-M2-L1) L2-XL-XXL and you should pick a size with approx. 30 cm positive ease at chest circumference.


The lace panel in the front is worked as intarsia - and intarsia in the round. Now, I know this sounds terrifying but I promise you it isn't difficult at all. The pattern also includes a photo tutorial on intarsia in the round so this could be the perfect chance to learn a new technique.


You can buy the pattern at my Ravelry shop. A lovely LYS Snurre, from Helsinki sponsored the yarn. Thank you!


I must say, this turned out just about perfect - even if I'm a bit partial. It's warm and soft and increbildy light. The contrast color lace panel brings just enough something special to this basic boxy sweater.


If you're wondering about the needle sizes, I have a thighter tension when knitting in the round so I used a larger needle for the sleeves. I should probably think about these things more often, I might end up with more well fitting garments!

There are more pics on Ravelry. I'm going to go ponder over my next design.