Showing posts with label cables. Show all posts

10/01/2021

Juuri

One great thing about being a knitwear designer is that I sometimes get to try out new yarns in advance. Last autumn, I got a sweater quantity of the new Tukuwool DK. And of course, I designed a sweater pattern for the yarn but then I had to wait for the yarn release and then, for the colder weather so that you could imagine yourself wearing a DK weight sweater. But the time has come!


What: Juuri / Own pattern
How: Circular needle 4.5 mm
From: Tukuwool DK, 495 g

Since this is a new yarn, let's start there. I was super excited to try it out but also nervous since untreated Finnsheep wool in DK weight could easily be quite coarse and stiff.


But this yarn stole my heart on the first stitch. I was surprised to find it had a wonderfully loose twist which made the yarn airy and light - and somehow even a bit softer than Tukuwool Fingering. I liked it a lot! I chose Ujo color for my sweater. This greyish pink is my favorite from the Tukuwool color chart.


The thick yarn was screaming cables. Inspiration came easily and I wanted to create a lushious cabled sweater with lots of positive ease and a tall cowl neck.


Juuri is worked seamlessly top down. The shoulders are worked in ribbing while shaping them with short rows. Once the short rows are done, the ribbing starts to twist and turn into cables for the rest of the body. The long sleeves are stockinette stitch with tall ribbed cuffs. The tall cowl neck is also worked in ribbing and the hem has a slit.


Originally, we took the photos last winter but I figure we should have another photoshoot as I'm hoping there's still some time to go until snow starts falling. You can find the pattern on Ravelry and my web shop (annajohannadesigns.com) and you can get 15% discount with the code ROOT until Ocober 17th.

8/02/2021

Slow making

Over the past years, this blog has been focusing on showcasing my new designs. But every once in a while, a designer needs a holiday. And what else would I do on my spare time but knit with someone else's patterns? So I made a sweater. But to talk about this sweater, we need to go back in time about three years. You see, this is no ordinary sweater but my very first handspun sweater.


What: 2-ply, 1580 m / 370 g, sport weight
How: My trusty Majacraft Rose
From: Pirtin Kehräämö Finnish wool

Some of you might remember how back in December 2018, I visited Pirtin kehräämö mill for a tour. I marveled the journey from wool to yarn on those big mechanig spinning machines. And then, I saw something gorgeous: a 2 kg bale of the most beautiful pale light grey wool. It was a mix of Finnish wool, meaning it's probably a mix of Finnsheep and Kainuu grey. And at that moment, I decided it was about high time I would finally spin myself a sweater quantity!


Fast forward 2.5 years and I was done with the spinning part. It did take a fair amount of time. When it comes to spinning, I tend to have long breaks in between and then do a lot of spinning over a single weekend. I was a bit nervous how far my patience would go with spinning a basically colorless fiber for an entire sweater quantity. Slowly but surely I did it! For me, the most natural weight to spin is fingering weight. So I had to make a conscious effort to spin a bit heavier plies and also keep the twist loose enough to get a soft sweater. I'm so happy I managed both goals.


What: Journey / Alicia Scheider
How: Circular needles 3.25 and 3.5 mm
From: Own handspun on my Majacraft Rose, 370 g

So I finally finished the yarns this spring and in the beginning of May, I casted on for a sweater. I had already decided this would be holiday knitting so I spent hours rummaging through Ravelry for the perfect pattern. I ended up with two options and asked Hubby to decide for me. To my surprise, I realized both options were worked bottom up but oh well. Let's just go with the flow. 


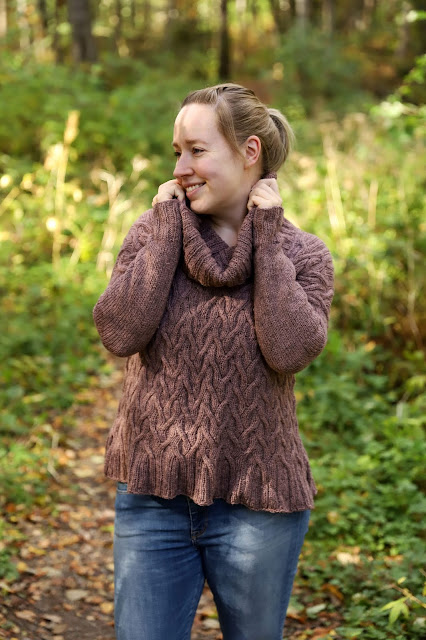
I prefer working lace over cables any day but I really wanted to use this yarn for a cabled sweater. I was already dreaming of cold dark nights at the summer cabin, wrapping myself in my brand new sweater.


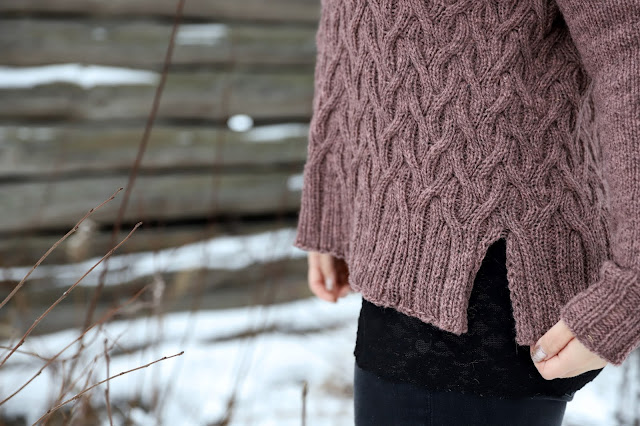
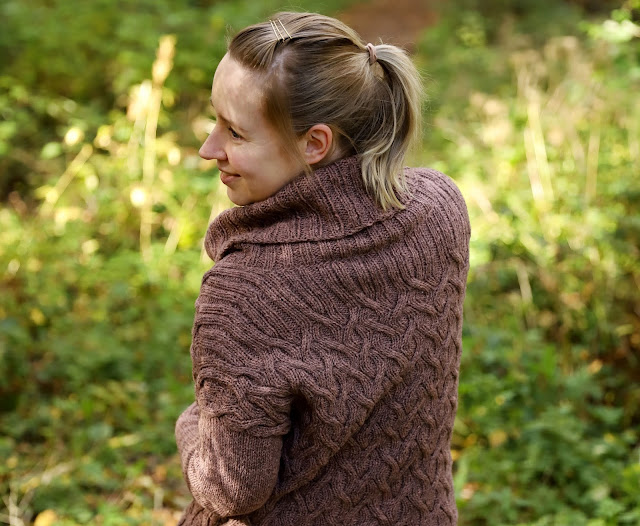
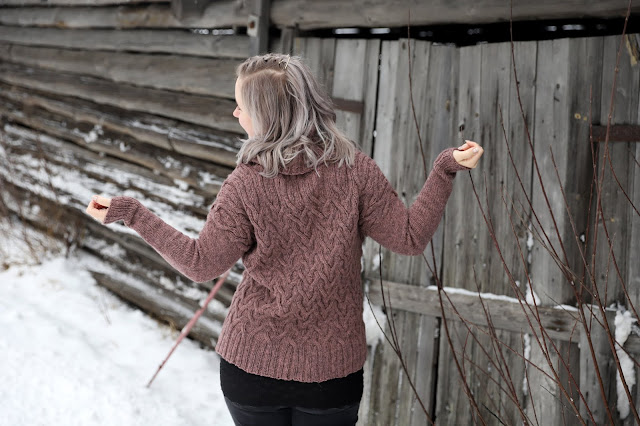
The design of this sweater is just gorgeous. It's worked bottom up and both the front and back are adorned with identical cables. The difference only comes when shaping the neckline. The hem has a little slit and the edge stitches were worked with a neat i-cord.


The sleeves have cables as well, and these wonderful, long cuffs that go all the way to your fingertips. That's just how I like my sleeves. You can always fold over the cuffs if you need the get them out of the way but I love that you can wear them long to keep your fingers warm.


I started the sweater in early May with the intention that there was no hurry to finish. This would be holiday knitting, something to work on when I don't have anything more pressing on my needles. Needless to say, I got carried away with the joy of knitting and couldn't stop. So in the end, I finished the sweater in July.


I already bound off my stitches once and even wove in the ends. I spent a while thinking about the neckline. The pattern instructed to work the neckline ribbing with two threads and a small needle but I kinda wanted to have either a folded ribbing or a tall cowl neck. In the end, the yarn decided for me as it ran out.


As I was playing yarn chicken, I decided to work the ribbing as far as the yarn would stretch and then bind off sewing the stitches into place, making a folded ribbing. I almost made it, needing just a meter of scrap yarn for the last few stitches to bind off. 


As said, I already wove in all the yarn ends before trying the sweater on - only to realize my neckline wasn't working. I usually make all my sweaters top-down which makes it easy to work a folded neckline ribbing, starting with a provisional cast-on and making the fold super neat. Working bottom up, you have to bind off the folded ribbing sewing the stitches in place and for this sweater, it wasn't looking good. First of all, the neckline ended up being too loose and my bind-off was looking a bit wonky and bumpy.


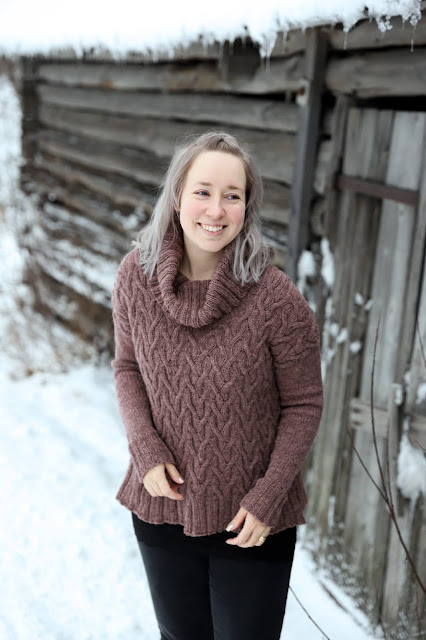
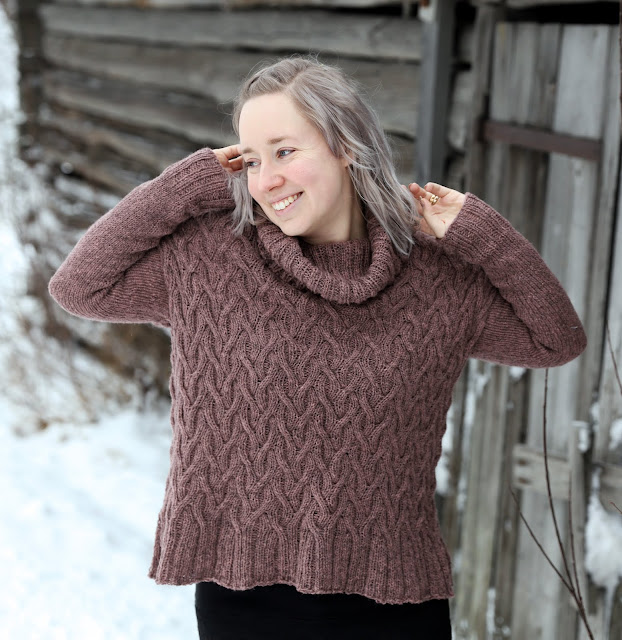
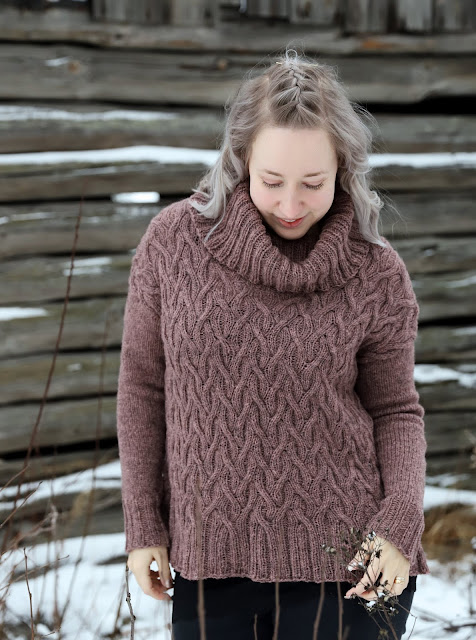
So I gave up and admitted I would have to spin one more skein as the tall cowl neck would be a better solution. It didn't take too much time to spin another 200 meters but it really made a huge difference with the sweater. I got myself a nice, tall cowl neck which looks absolutely beautiful on this pullover.


Knitters are typically cast in two categories: there are process knitters that love the process of knitting and then there are project knitters that are looking forward to the finished garment. I'm more of a project knitter myself. Don't get me wrong, I always need to have a wip on my needles and I love the process of knitting but after a couple of rounds, my thoughts are already on the finished sweater. This slow make taught me a lot about patience. The project took almost three years altogether and forced me to embrace the slowness of it all. And I did. And would you just look at the gorgeous sweater I got in the end!

4/25/2021

Intertwined

Most of the time, I crave for challenges in my knitting and when it comes to yarn, untreated woolly wool is my favorite. But sometimes, you long for something simple and good old merino. That's what happened with this pullover.


What: Intertwined (Rav link) / Own pattern
How: Circular needles 3.5 and 3.75 mm
From: WalkCollection Merino Sport, 315 g

Intertwined sweater got its name from the cables winding down from shoulders to cuffs. They get their fun texture from garter stitch.


The sweater is relaxed and boxy. It's got long sleeves and no waist shaping. 


The cables get to truly shine as the sweater is worn with the purl side out. But fear not! All in-the-round parts are worked on the WS with just endless knitted stitches so no need to worry about purling.


The sweater starts with working two shoulder straps that you then pick up stitches from to work the back and front separately until you reach the undearm. From then on, the work is joined in the round.


My favorite thing about the design is how even though the body and sleeves are worked in different directions (as usual), the cables run seamlessly down from shoulders to sleeves.


As always, you can find the pattern on all my platforms: RavelryPayHip, and Lovecrafts. And I'm happy to tell you that it's time for my Spring Sale! Right now on Rav and PayHip, you can get Intertwined and ALL my self-published patterns for 25% discount with the code SPRING2021. The code is valid for the next two weeks, all the way to Sunday May 9th.

2/03/2021

Sandy Shores

I love it that we have a proper winter here in Finland. And what would be more appropriate for that a warm and cosy beanie?


What: Sandy Shores / Own pattern
How: Circular needles 3.75 mm and 4.0 mm
From: Nature's Luxury Town & Country Cashmere, 75 g


I haven't designed a hat for a while but when I fell in love with these gorgeous Nature's Luxury cashmere fade kits I knew right away that I wanted to make a new beanie. I used the Sandy fade kit for my sample - hence the name for the hat.


Sandy Shores is a sweet hat that starts off with a neat tubular cast-on. It takes a couple setup rows but gives the neatest, round cast-on edge. The pattern comes with a photo tutorial for tubular cast-on so fear not.


The hat is adorned with intricate cables and fun bobbles. And of course, a pompom! My favorite thing is that the pompom is attached with a button so you can easily remove it if you need to wash the hat or aren't feeling pompom-y some day.


In my weekly Tea Time over on Instagram, there have been lots of questions on how to make such a perfect looking pompom. There's a simple trick for that. First, I use a pompom maker. It's easier to get a full pompom with that than using a cardboard cutout. But the perfect fluffiness is achieved with a cool trick: once the pompom is finished, hold it over a tea kettle because the hot steam will make the plies of the yarn open up, giving it the perfect fluff. 


I designed the beanie in collaboration for Nature's Luxury's stunning cashmere yarn and you can find kits over on their web shop. They're offering the pattern with the kit. You can also get Sandy Shores as an individual download on RavelryLoveCrafts and PayHip. Use the code SANDY to get 15% discount until the end of this week.

11/18/2020

Sleight of Hand

So it's not one but two new patterns this week! It's time for the third and final design of my mini sock collection.


What: Sleight of Hand / Own pattern
How: Circular needle 2.25 mm
From: Wool Me Once Fibers Gold Glitter Sock, 47 g

In the summer, I got the urge to knit socks. The sock fever wouldn't go away with just one pair so I ended up designing a mini collection - all ankle socks with sweet picot trims.


The collection was inspired talented Finnish indie dyers (and my need for ankle socks). I also named all the designs after the colorways I knit them with.


The third and final design in the collection is Sleight of Hand, named after this stunning golden colorway Ochrus Pochrus. I fell head over heels in love with this golden glimmering Gold Glitter Sock by Wool Me Once Fibers. It's got my favorite high twist merino base with gold stellina for a bit of sparkle.


Sleight of Hand socks are worked cuff-down. They start off with a sweet picot edge that is worked with a provisional cast on. The socks are embellished with cables and cute bobbles. The socks are worked in reverse stockinette stitch to make the cables really pop. Not to mention how luxurious the stockinette stitch on the inside feels against your skin. The heel is a simple and fun short row heel.


In fact, all three designs in the collection feature a different heel construction, making this collection an excellent opportunity to practice heels. All three patterns come in three sizes, 64, 68 and 72 sts.


You can find all three sock patterns on RavelryPayHip and Lovecrafts. You can buy them individially or as an e-book. If you've already bought Kvartsi and Ripple socks, Ravelry should give you a generous discount for these.