10/01/2018

Pioni

Do you know the feeling when you're not at your finest trying to take pics of a finished knit? You know how that unpleasant feeling transmits itself from the pics to the actual knit? Yep. I almost wanted to throw this lovely little cardigan in the trash because it started to seem impossible to get good photographs of it. Luckily I and more than one photographer were persistent enough to keep trying because it really is a very sweet cardigan.


What: Pioni / Own pattern
How: Circular needles 4.0 and 4.5 mm
From: Little Grey Sheep Stein Fine Wool 4 ply, 430 g
Ravelryssa

Last spring I visited Edinburgh Yarn Fest for the very first time and I bought lovely British wool yarn that has been aching to get on the needles. The yarn is light and airy, woolly and warm - very sheepish. Little Grey Sheep is a small family farm and the yarn labels even have this lovely story about the life of the sheep and who shears them at Christmas. So sweet!


Are you one of those knitters that hate ending up on sleeve island when you feel like the sweater should already be finished? I know I am. So I had a vision of a cardigan where you would start by working the sleeves and they wouldn't come to haunt you at the end. That's how Pioni was born.


Pioni starts off working a bolero-like top part sideways from one wrist to the other. You will work the first sleeve in the round, bind off a few stitches at the underarm, work the back flat, cast on a few stitches for the other underarm and join in the round to work the second sleeve. There's a chunky cable going across the sleeves and the back, and the rest of the top is broken 2x1 ribbing.


Once you finish the top part, you'll pick up stitches around it to work the body top down in one color brioche. The body has two increase rounds to give it A-line shape. The construction of the cardigan also makes it so that the fronts are shorter than the back.


Finally, you will pick up stitches along the fronts and back of the neck to work a button band in garter stitch. I designed this cardigan to have larger than average button holes because at least my button stash is bursting with those gorgeous huge buttons you almost never get to use. The button band is finished off with an i-cord bind off.


I really enjoyed knitting this cardigan but taking photos ended up being a pain in the butt. There was always something wrong: either my clothes were crinkled, it was way too windy, too bright or too dark. Luckily in the end, I did end up with enough nice photos to present the cardigan to you.


Pioni can be found on Ravelry and you can get it -25 % during this week using the code SWEETPEONIES. In case you were wondering, pioni is Finnish for peony.


Some crafters are seasonal knitters. They either stop knitting completely for the summer, or at least switch to cotton yarns. I'm all about wool all year long. Even though this summer in Finland was scorching, I didn't mind having a sweater quantity of 100 % wool in my lap most of the summer. And it's lucky I didn't because now as the weather has turned and the temperatures are sinking, I get to wrap myself in this warm woolly cardigan.

9/25/2018

Split cells socks


What: Split cells / Jeannie Cartmel
How: Circular needle 2.25 mm
From: Cascade Heritage, 67 g
 Ravelryssa

Back in spring I had the idea of a box of socks. I would get rid of lonely sock yarn skeins, finally work some patterns bought long time ago, and the person opening this box at Christmas will be very happy, I think.


However, I didn't stop to think that perhaps not all patterns bought long time ago would be my cup of tea anymore. You know, there might be a reason why I never got around to working a certain pattern. For example these socks, since nowadays I don't really like cables all that much.


I started the socks back in July on a business trip. I finished another project and was eager to cast on for another pair for the Box. I was excited to finally use this Cascade Heritage skein I got from a friend as a present, and the Split cells socks by Jeannie Cartmel have been lingering in my Ravelry queue for ages.


The yarn was great and it was nice to get back to this basic sock yarn after a long time. I also really like this bright deep green color. The pattern was well written and clear. The only problem was that the socks have about a million and three (yes, I counted!) two stitch cables with some of them having twisted stitches, and some of the having just one twisted stitch, and some of them having no twisted stitches and and and... You get the point, right?


The heel flap was the worst. I really, really like socks where the stitch pattern continues over the heel flap. Except that in this case it meant working twisted purled stitches. And that would be fine too, except that because of the cables worked on the RS, the twisted stitches kept switching places making it really hard to spot them on the WS. This was not the kind of project you can easily work at a knit night.


So, I started the socks back in July and only now finished them at a knitting retreat last weekend. Oh boy, was I happy to bind off. The Box has six pairs in it already, and still room for a few more. Perhaps something simpler next time.

9/19/2018

Still

I just hate it when I have to admit I was wrong about something. But I guess it's nicer to admit defeat in a beanie made of mohair/silk and cashmere...


What: Still / Own pattern
How: Circular needle 3.5 mm
From: ITO Karei + ITO Sensai, 22 + 13 g (for the grey, size L) and 17 + 11 g  (for the purple, size M)
https://www.ravelry.com/projects/NeulistiMNK/still-ii
https://www.ravelry.com/projects/NeulistiMNK/still

But let's start from the beginning. Nowadays, it's very trendy to combine two different types of yarns for projects - especially such that the other yarn is mohair/silk. I've always loved silk but I can't stand mohair. Or so I thought.


I have only one mohair(/silk) sweater in my wardrobe that I actually use. The others I've given or thrown away over the years since all I got from them was a terrible itch. On the other hand,k I really like that one sweater and don't have any problems with it. So perhaps, those other knits haven't been made in a quality yarn?


Anyway, I had firmly decided I wasn't getting along with mohair and could let this knitting community fab pass me by. Except... My LYS started to carry those candy-like little skeins of ITO Sensai. They are so pretty. And to top it off, they just got a shipment of ITO Karei, the new 100 % cashmere yarn. There was also this one sample knit beanie combining the two. I was smitten. It didn't feel itchy, not at all. If I'm totally honest, it felt quite heavenly.


I wasn't going to buy anything. I just wanted to feel the yarns. But of course, before I noticed, I had already bought a skein of each. And, I cast on right away.


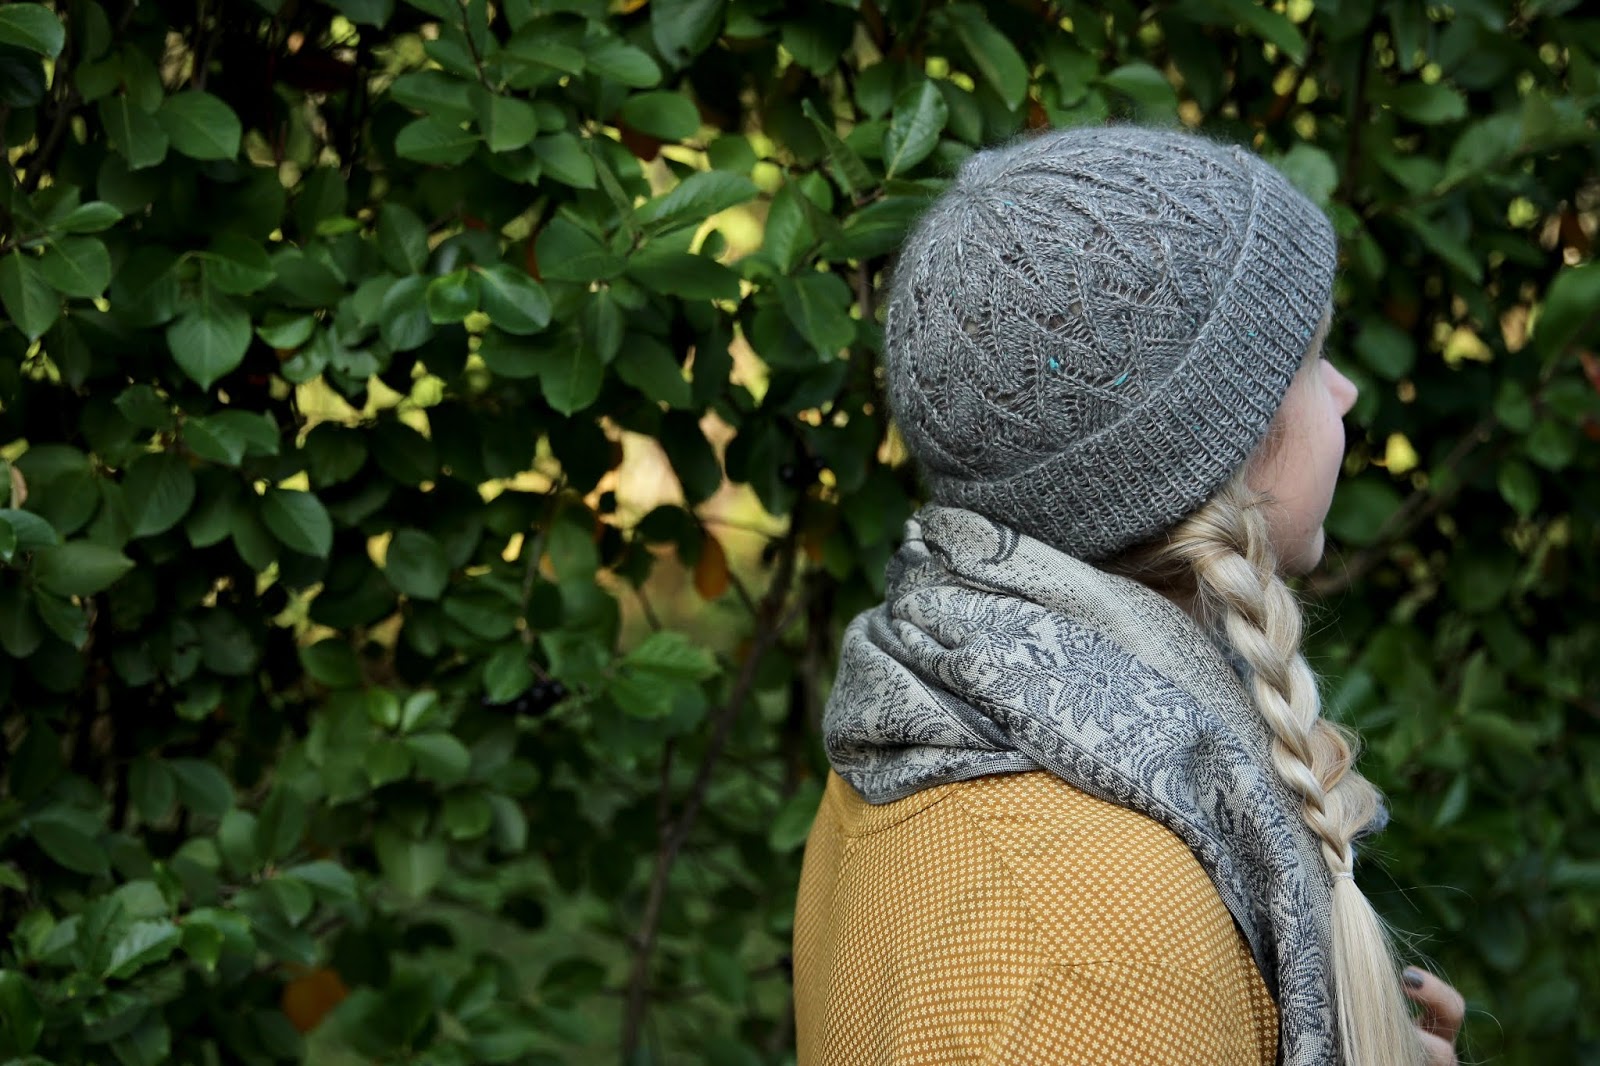
I designed this light as a feather hat with the yarn combo. The hat has a tall ribbing that can be folded in two for a more fitted beanie look. The rest of the hat is easy lace worked on every row and the crown decreases are hidden among the lace. The lace looks so delicate worked in this cashmir-silk/mohair combo.


The hat can be made extra special by choosing one of those few Sensai colors where the silk core is a different color than the mohair fluff around it. It makes the yarn glow. And since my LYS had more than one of those special colors, I had to make another beanie.


The pattern has two sizes, M and L that fit a head circumference of 9.75-22.75''. And, there's a 25 % discount till Sunday September 23rd if you use the code FLUFF.

9/07/2018

Do-over

Back in the prehistoric year 2014, I designed my very first graded sweater pattern. I took a trip down memory lane and revamped this free pattern.


What: La grasse Matinée / Own pattern
How: Circular needles 3.0 ja 2.5 mm
From: Rowan Fine Tweed, 274 g

I didn't knit another sweater but I cleaned up the pattern to the layout I use now. And since I don't like letting myself take it easy, I re-calculated the pattern for all the nine sizes I use these days. Back then, the pattern had "only" sizes S-M-L-XL.


La grasse matinée is an easy sweater and a great pattern for your first top down sweater project. It has 3/4 raglan sleeves and the body has no waist shaping. The hem and sleeve cuffs have a pretty little row of eyelets before few rows of garter stitch.


It was fun reminiscing this old pattern. It's been just few years but my, how I've grown as a designer - the techincal skills to grade patterns and to make clear schematics. Not to mention photography skills!


I decided it would be fun to take new pics with the same hairdo and clothing. Can you tell the difference in anything else except my blonder hair?

8/23/2018

Knitter's rucksack

How come? Because this backpack can easilly accomodate a huge knitted dress in progress as well as half a blanket's worth of yarn. Not that I bought half a blanket's wort of yarn. Nope, not me. Nu-uh...


How: Sewing machine
From: Linen-cotton from Almandiini + canvas and wool from Eurokangas, metal parts from Kangaskapina

Even though I'm sewing all the time, I've wanted to keep this blog as a knitting blog. But every once in a while I do happen to sew something especially well suited for a knitter - like this backpack.


The whole thing started when I spotted on Instagram that the knitwear designer Joji Locatelli had made this backpack. Right away, I had to find out who designed the pattern for the bag. It didn't take long till I had purchased the pattern not only for the backpack but also for a handbag / project bag, and at the same time I was already adding the metal parts needed to my shopping basket at another web shop. First thing Monday morning I went to my local fabric store to get the lining and canvas, and Tuesday evening, I had my backpack finished. That escalated quickly.


So I spotted a really cute backpack and I knew from experience (I've made a weekend back before) that I can manage this. I knew from my previous bag project where I could buy all the metal parts and fusible interface. I followed the pattern otherwise but just kind of winged it with the interface pieces trying to make them work from scraps. And because of that, I accidentally used the thickest interface for the front of the bag and not the back piece which would have needed it the most. Oh well. And, since I clearly learned nothing from the first bag I made, I repeated my mistake of buying thick fabrics and still adding thick interface to them. My sewing machine was crying a bit but did manage to pull through. Luckily the messiest stitches could be hid inside the bag.


The backpack has a fun cylinder shape. The bottom is sturdy canvas and the main fabric is lovely japanise linen-cotton mix from Almandiini. Because this was a fall project, I definitely wanted to have wool lining. It was a bit too sturdy for easy sewing but helps the backpack keep its shape. The lining fabric was also used for the straps. There's a folded zipper pocket in the front and a small open pocket inside. I was thinking of adding a laptop pocket inside but didn't want to try mods so soon into the project. Hubby ordered a backpack of his own and of course wants a padded laptop pocket - so I will get to make that modification after all.


I really like the shape of the backpack. The cylinder shape makes it possible to fold at different heights - depending on how much stuff you have inside, and the D-link closure is very pretty. The backpack seems much roomier than those store bought ones. Yesterday at the knit night of my LYS, the bag fitted nicely 600 grams knitted dress, two magazines and half a blanket's worth of yarn. Someone might ask if it's sensible to be starting a new blanket when my Beekeeper's quilt has been waiting two years for me to thread in the ends. That someone is politely asked to keep quiet and let me cast on for my new blanket.


I just wanted to add that the pattern was excellent. It had good clear sketches of every stage and I feel the sewing was quite easy. That's good, since I already have two more bags to make for Christmas.

8/13/2018

Twill and plain

Because I know myself pretty well, I knew I'd spend most of my summer holidays working on new designs. Therefore, I made a conscious decision in the spring that I would take a little holiday from designing before my actual holidays. Just enough to knit one sweater with someone else's pattern. 


How: Circular needles 2.5, 3.5 and 4.0 mm
From: Madelinetosh Merino Light (and a few meters of Skein Queen Crush), 430 g

What else would a knitwear designer idolize except of course other designers? For the longest time, I've been admiring a Polish designer, Marzena Kolaczek on Instagram. She knits with other designers' patterns, designs her own patterns, writes a knitting blog (in Polish but Google translate works quite well here), has a yarn shop, and to top it all off, dyes her own yarns as well. Not to mention that there's the husband who really knows what he's doing with the camera. And to add to all this, our knitwear aesthetics are really similar. As you can probably tell, I'm quite the fan girl.


I've been dreaming of making one of her designs for quite some time already. So once I made the decision to take a little break from designing, I knew who's design to pick. And one of Marzena's most recent designs, the Twill and plain pullover had been calling my name loud and clear. Luckily, I've switched from buying lonesome sock yarns to buying sweater quantities, so I did have enough yarn in my stash - four skeins of Madelinetosh Merino Light. As I was packing for a work trip in the middle of the night, there wasn't an opportunity to go shopping for new yarn. I tell you, having a stash of 30 kg is the best thing!


This project was super interesting but I wouldn't call it relaxing holiday knitting. Nu-uh. But I'm the type of knitter that enjoys challenges.


The sweater started with working the front piece from side to side to achieve the gorgeous twill texture. This sweater was kind of a combination of weaving and knitting. The weaved-like texture was done with slipped stitches, slipping with the yarn in front. And, there was the extra challenge of slipping stitches also on the wrong side - this time with the yarn in back. And, of course to achieve the chevron pattern, the placement of the slipped stitches was constantly changing. Doesn't sound very relaxing now does it? Well, it wasn't but it was amazing in so many other ways.


Once the front panel was finished, stitches were picked up to continue knitting upwards shaping the neckline at the same time. This part was worked in linen stitch, so more slipped stitches with the yarn in front.


The shoulders were shaped with short rows and the back of the sweater was plain vanilla, stockinette stitch. Actually, the pattern instructed to join the back and front only at the hem but I figured a few more challenges wouldn't be too bad. So, I calculated rough estimates for my tension in the front piece twill texture and the stockinette from the shoulders, and figured out how often I should work the edge stitches together. I'm all for 'join as you go'  instead of 'work 40 cm of stockinette stitch straight'. Every time you pause to measure, it's  a mystery: first you're missing 10 cm but then you work a few rows and measure again, and now you're missing 11 cm. I like how joining as you go shows the progress you're making. Plus, I hate seaming.


Once I finished the part requiring concentration, the marathon begun. Because, a folded hem requires twice as much ribbing as a regular hem. And that's not all folks: the hem was sewn into place. During another work trip, I spent 5 hours at Edinburgh airport sewing the sweater hem while waiting for  my plane which happened to be 5 hours late. And hey, I hear you, why didn't I just do a regular ribbing or use three needle bind off? Well.. If I'm totally honest, it was precisely these lovely folded cuffs and hem that made me want to have this piece in my wardrobe. And, I've tried the three needle bind off with folded hems but it easily gets too tight and this sweater really needed to be loose and relaxed. So, it was a ton of work but totally worth it. The only thing that bothered me a bit was that there were no instructions on how long a tail I should cut for the sewing. I measured a tail three times round the hem but still it run out just a few cm before finishing.


And just as I was finishing the sleeves, I got to play yarn chicken and lost. Even though, Tosh Merino Light skeins are almost always over weight, I still ran out of yarn. Of course, I had bought the skeins years ago and my LYS didn't have this color at the moment. Also, with hand dyed yarn, the colors can vary quite a bit between dye lots, and I had no intention on waiting for a month or so to finish this sweater. Alas, a stroke of luck: my LYS amazingly had almost the exact same color in a totally different yarn base by a totally different dyer, and I was saved. It was a bit irritating to start the backup skein just for the last two rows of the second sleeve and the neckband but I'm sure I'll find something to knit with the rest of it.


Now, what did we learn from all of this? A) I don't advertise myself being a masochist knitter for nothing as I really seem to enjoy challenges even with my holiday knitting. B) Different stitch patterns can eat up surprising amounts of yarn. C) Apparently, even this queen of uncolors can feel at home in colorful knits. D) What a gorgeous sweater! Truly, I have to say, this marathon post isn't intended as complaints of any kind. The length of the post is due to this being the most interesting project in a while. This wasn't a mindless TV knit but I enjoyed it immensely, and now I have this lovely merino armor to keep me warm once the sweater weather hits.